Appearance
Invite Users
NOTES
- If someone from your organization already has a WebAccess/DMP account with a company created, the easiest and recommended way to add other users is by invitation as described on this page. If you are the first from your organization to register, create an account yourself and then invite your colleagues — see Account Access.
- The invitation process is the same for both new and existing users. The only difference is that an unregistered invitee receives a registration link, while an already-registered invitee receives a link to accept the invitation and join the company.
- To invite users, you must have the Add Users permission.
- The invitation is valid for 30 days.
Open the Users page from the side menu while viewing the target company.
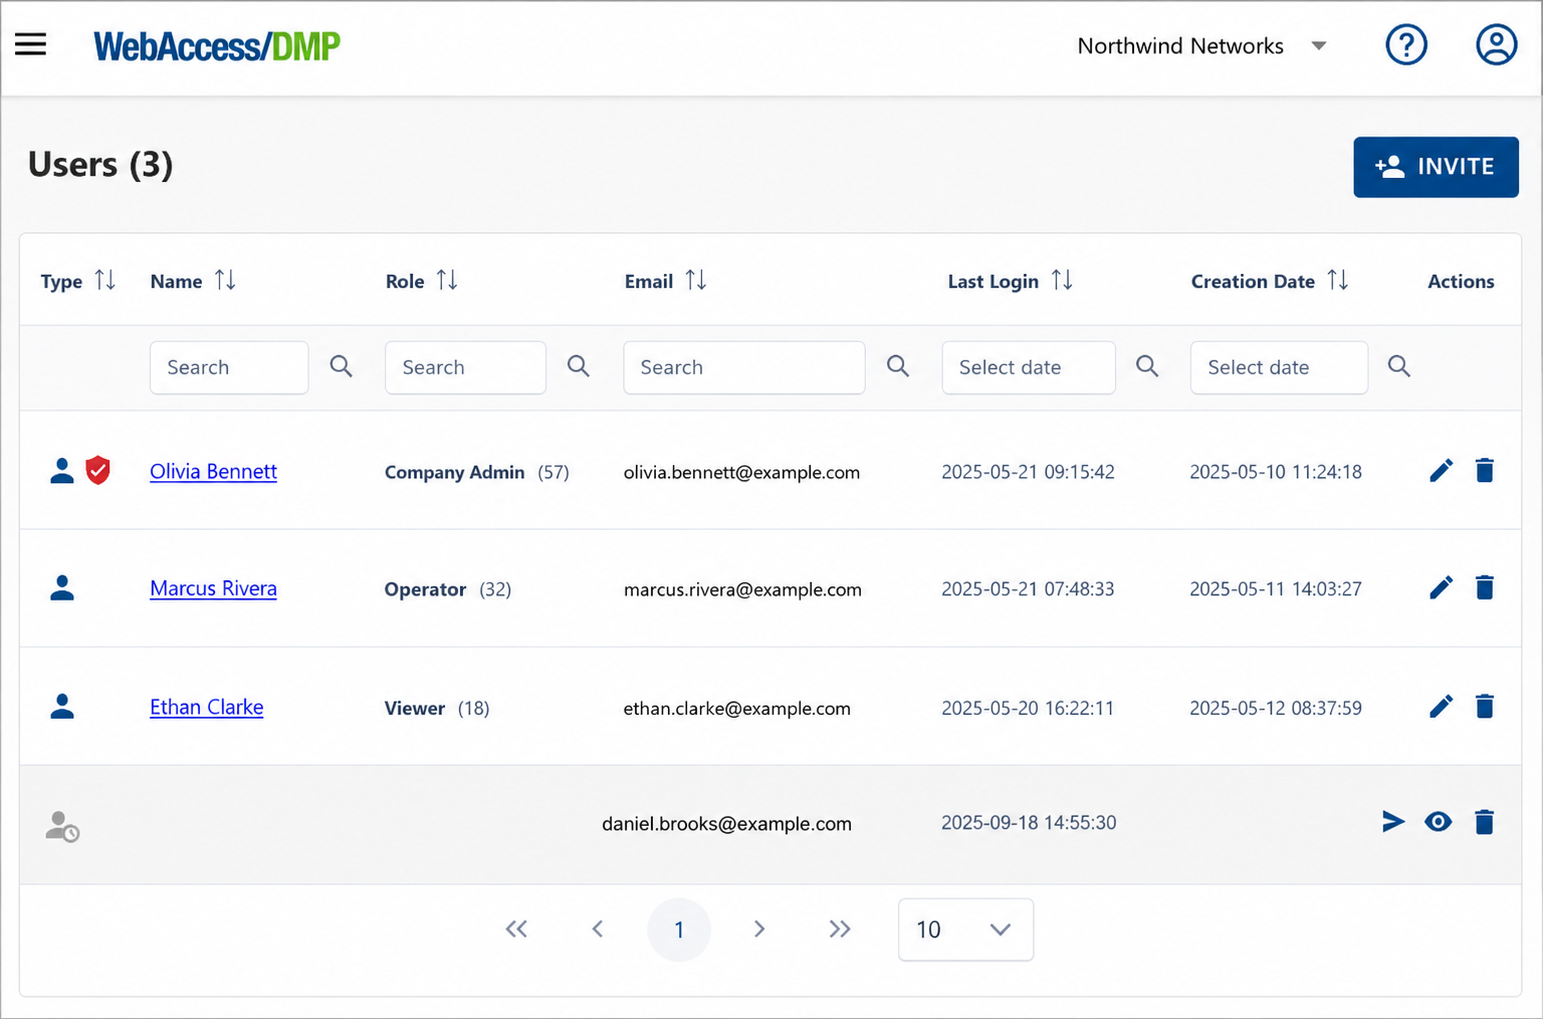
Click the Invite button in the upper-right corner, fill out the form with the invitee's email address and a predefined role — see User Roles for details — then click Invite to send the invitation email.
The invited user appears in the user list in gray (as shown above for daniel.brooks@example.com). You can use the blue arrow button to resend the invitation or the trash can icon to delete it.
The invitee receives an email with a confirmation link. If they are not yet registered, the link opens a registration form where they fill in their name and password, or sign up using a Microsoft or Google account. If they already have an account, the link lets them accept the invitation and join the company directly.
Once accepted, the new user can sign in to WebAccess/DMP and access company resources based on their assigned role and permissions.