Appearance
Device VPN Settings
This page describes the VPN status and per-device settings available for an individual device.
Device VPN Status
Important
To connect a device to VPN, the DMP Client Router App version 3.2.0 or later must be installed.
The VPN connection status of a device is visible:
- In the device page header.
- Via the VPN Connected field on the dashboard.
- On the VPN Network detail page when the device is part of a network.

On the router itself, you can check the VPN connection status in the DMP Client Router App:
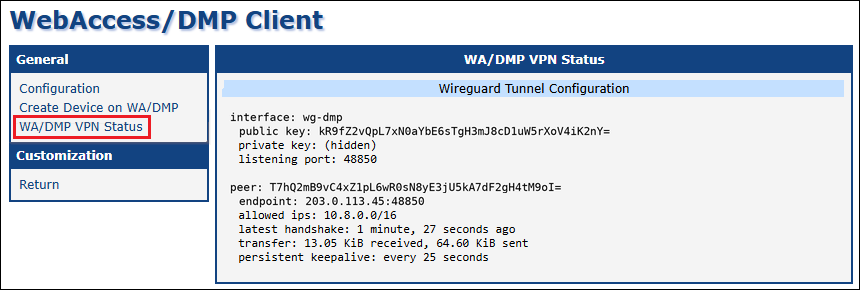
VPN Tab on the Device Detail Page
In the device's VPN tab, you can configure the following options:
VPN Enabled — Enable or disable the device's VPN client.
- When disabled, the device disconnects from VPN and stops routing VPN traffic.
- When enabled, it reconnects and resumes secure communication.

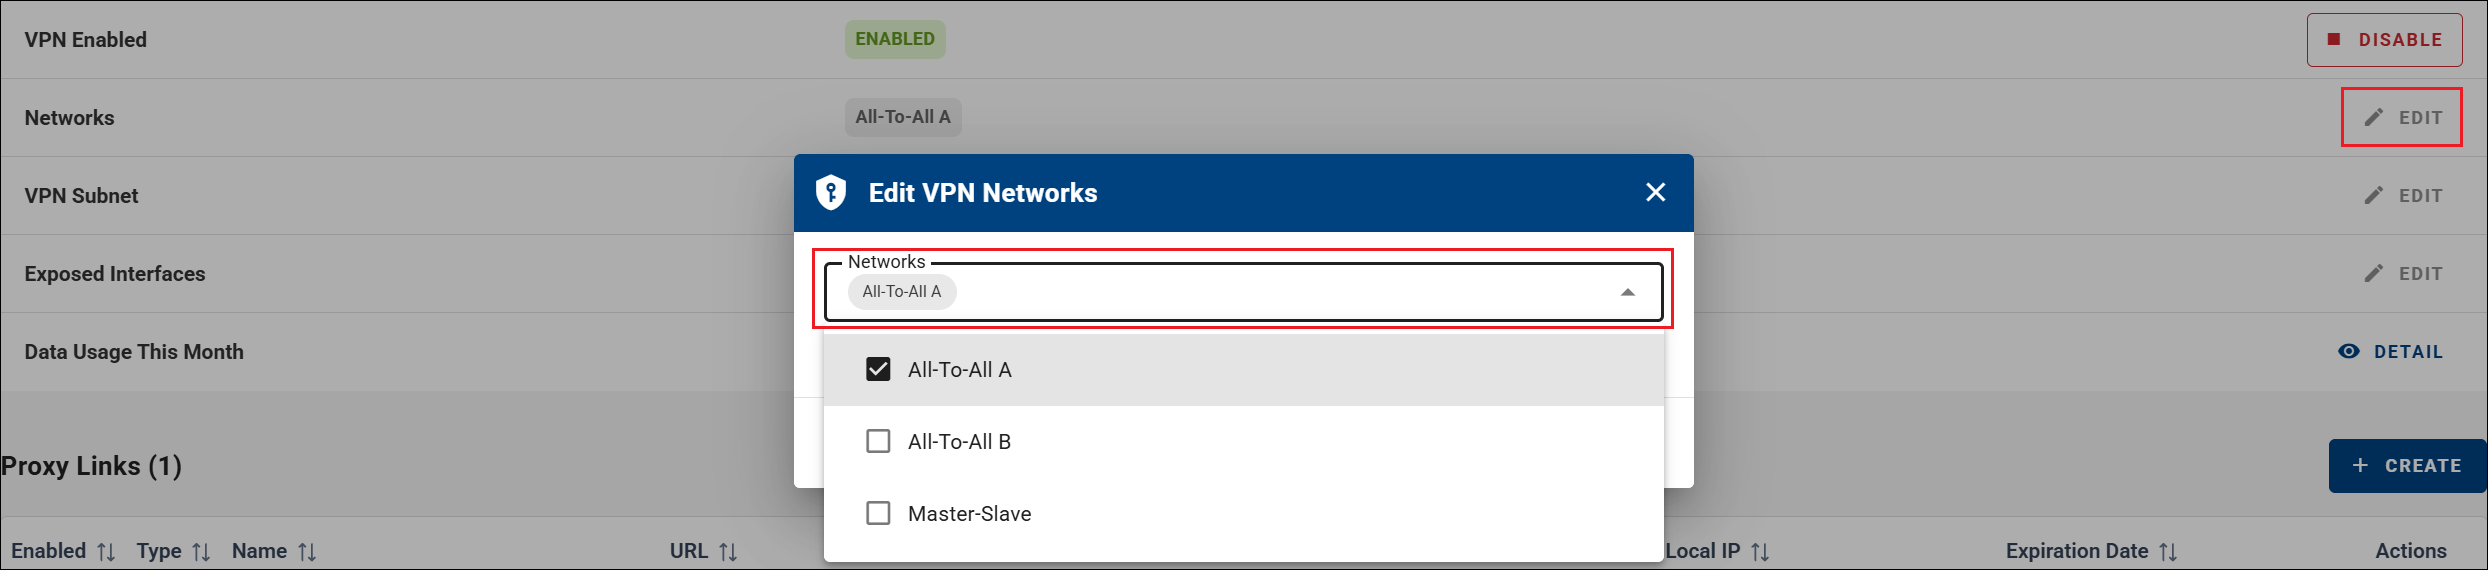
Networks — Add or remove the device from VPN networks, controlling which devices can communicate with it.
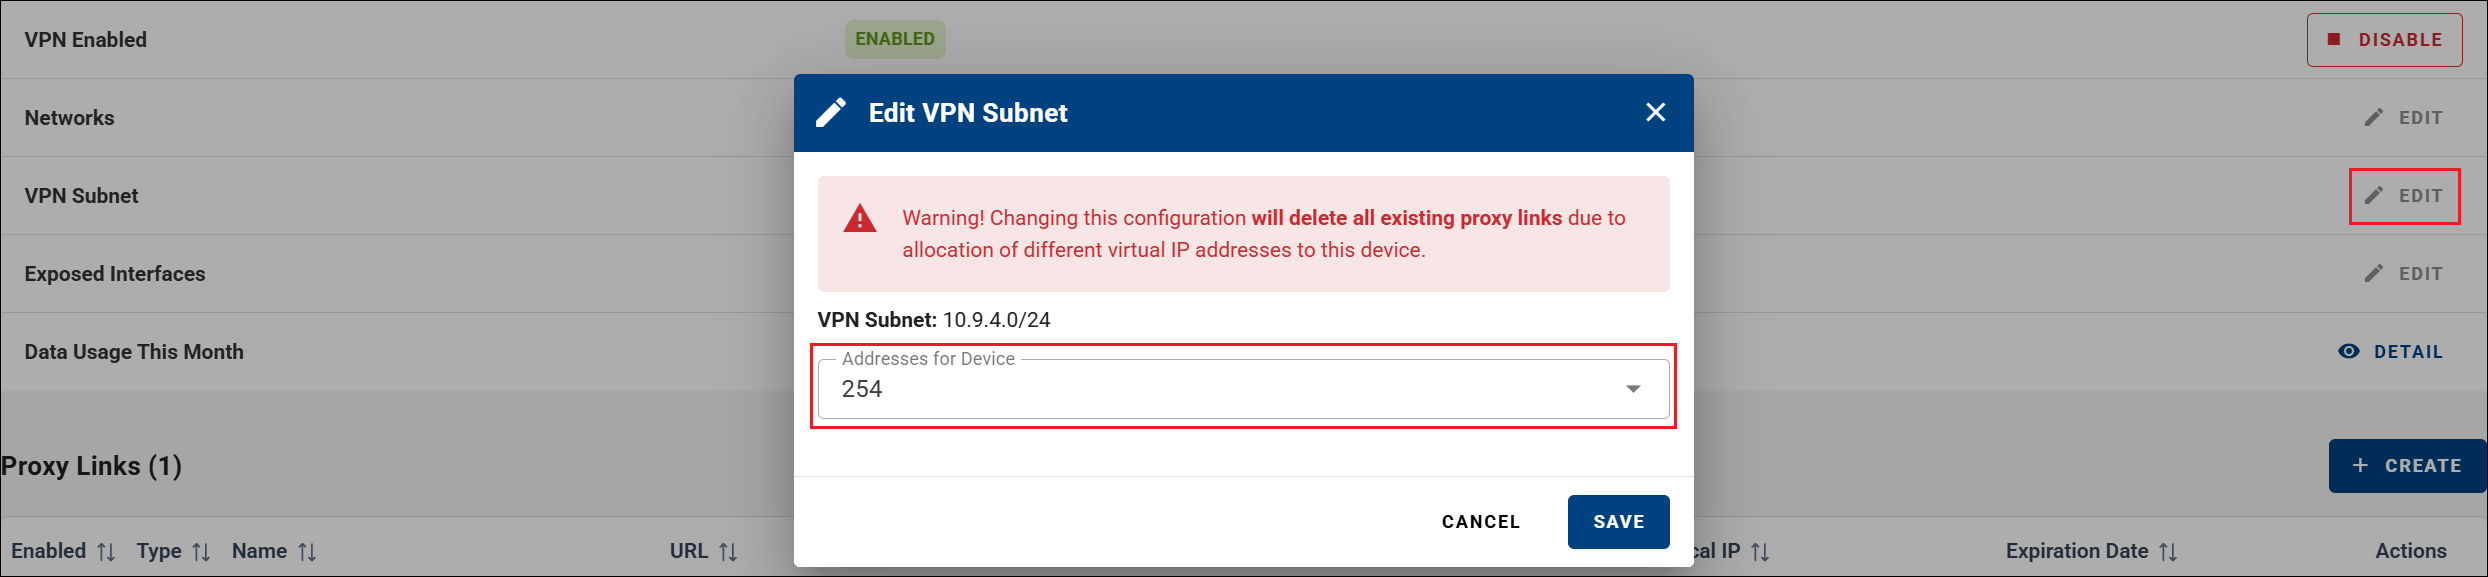
VPN Subnet — Configure how many virtual IP addresses are assigned to the device.
- Changing this setting reassigns IP addresses.
- All existing Proxy links are removed.
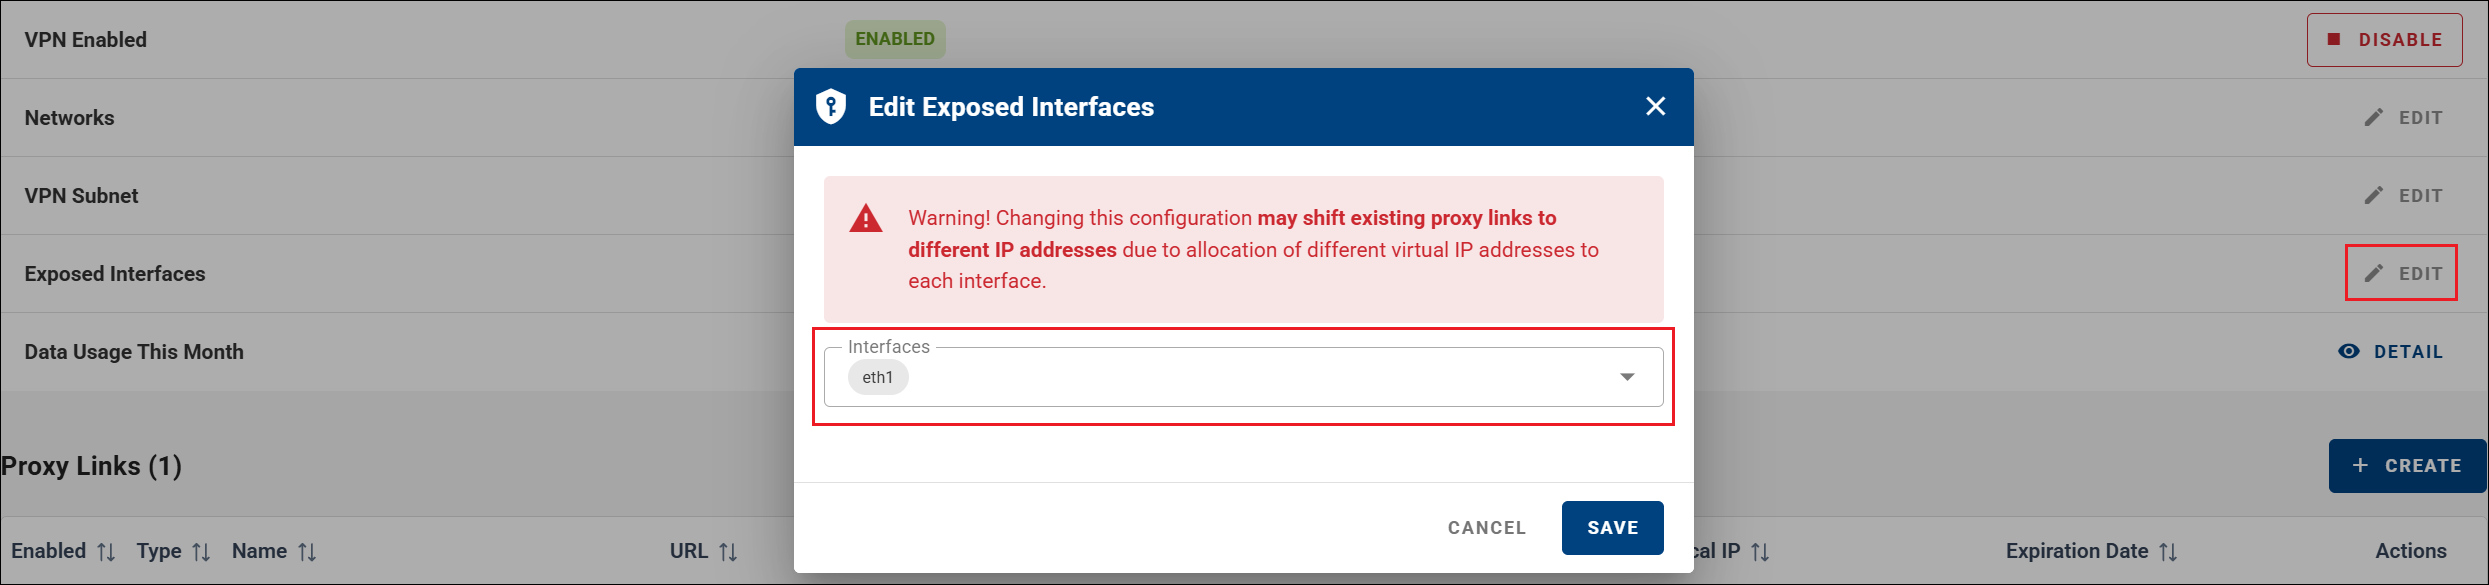
Exposed Interfaces — Define which router interfaces are accessible over VPN.
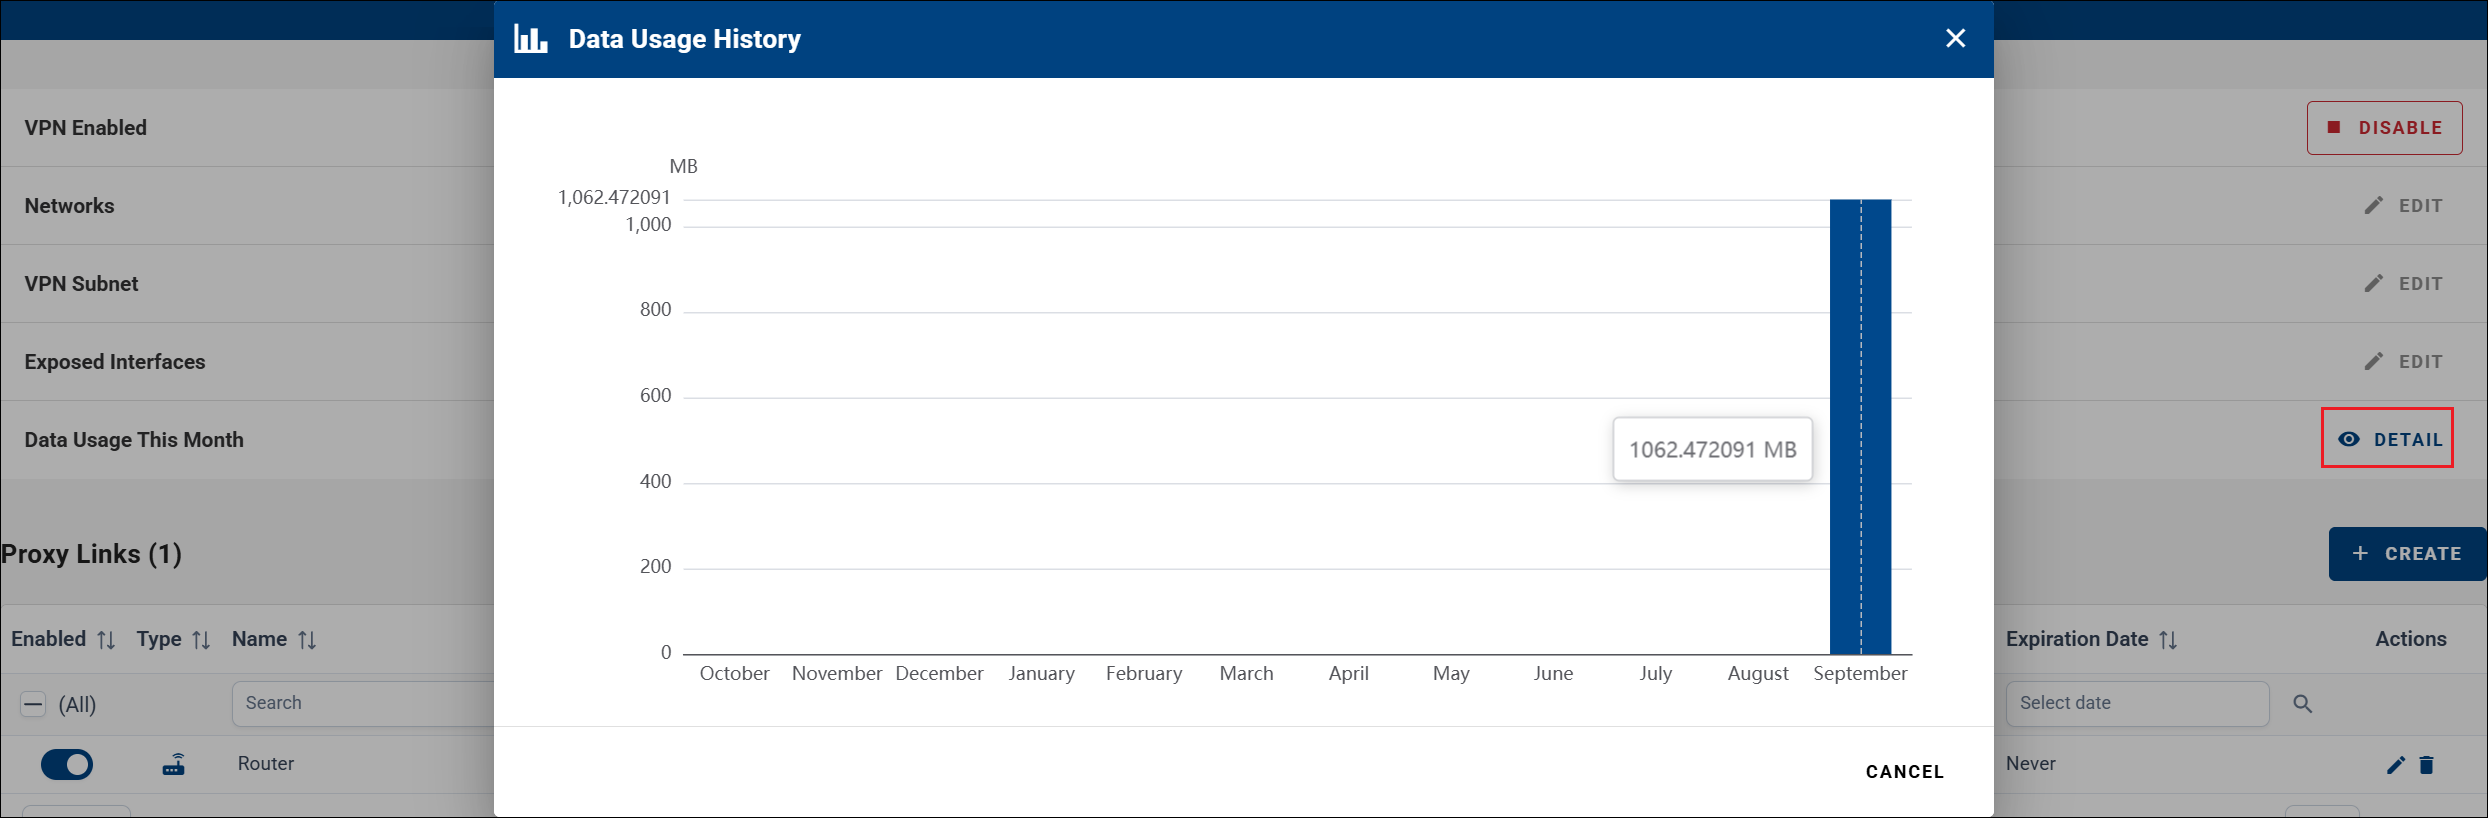
Data Usage This Month — View the device's VPN data usage history.
Proxy Links

Enable or disable the Proxy link using the toggle switch. Disabling a Proxy does not delete it.
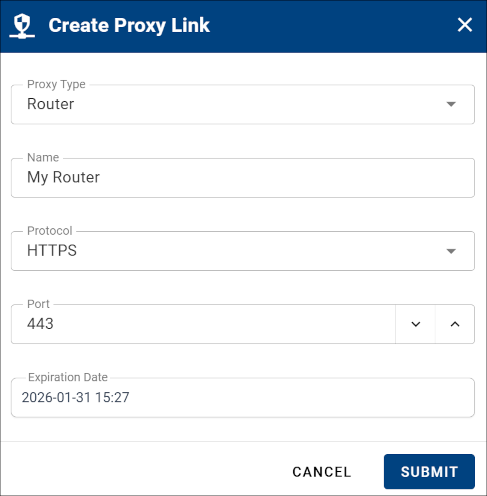
Add additional Proxy links by specifying:
- Proxy Type — Router or LAN Device.
- Name — Proxy link name.
- Protocol — HTTP or HTTPS.
- Port — Target port.
- Expiration Date — Automatically deletes the Proxy after expiration.
This is useful when accessing a device with a web interface behind the router via VPN. You must know the local network address of the target device.
Existing Proxy links can be edited or deleted using the actions next to each link in the list.
LAN Device proxy
Set Proxy Type to LAN Device to reach a device behind the router — for example a PLC, camera, or HMI with a web interface — instead of the router itself. Enter the target device's local network address and port, and the Proxy link forwards to it over VPN.
Caution
Adding a Proxy link exposes the service to the Internet. The corresponding LAN interface is automatically exposed in the Interfaces section.
Additional notes:
- Proxy configuration changes may take up to 3 minutes to propagate.
- File uploads through a VPN Proxy link are limited to 256 MB.
- Known issue: Proxy links do not work with firmware versions 6.5.0 and 6.5.1. Upgrade the firmware to resolve this.
Interfaces
Router interfaces are listed in the Interfaces panel on the device's Monitoring tab, showing each interface's link state and local IPv4 addresses. From this panel you can:
- Expose or unexpose an interface using the Exposed toggle. Unexposing blocks VPN traffic to devices behind the interface, and VPN subnet changes may reassign Proxy link IP addresses.
- Open an interface's detail (the action in the last column) to view its settings, including the Local Address Translator (NAT). An interface must be exposed to configure NAT.
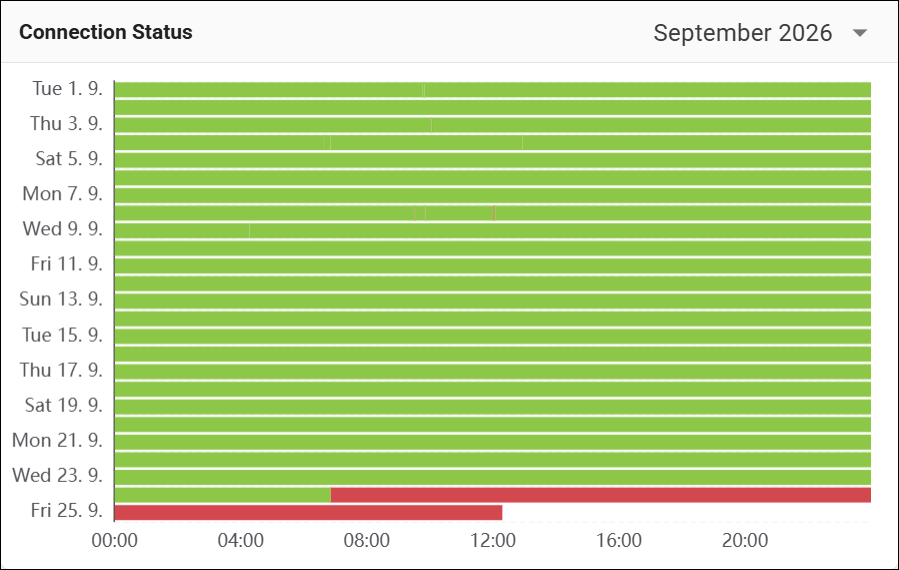
Connection Status
A device's connection status is available on the Monitoring tab through the Gantt Chart widget. Add a Gantt Chart to the Monitoring tab and select a field such as Connection Status to visualize when the device was connected or disconnected over time.